Raspberry Pi 5, Argon NEO 5 case and NVMe SSD unboxing
The Pi 5 introduced a lovely little PCIe slot onto the Raspberry Pi board. Ideal for attaching an SSD drive, which is just what the Argon NEO 5 M.2 NVME connects to. Let's unbox the kit and get it up and running.
Shopping list
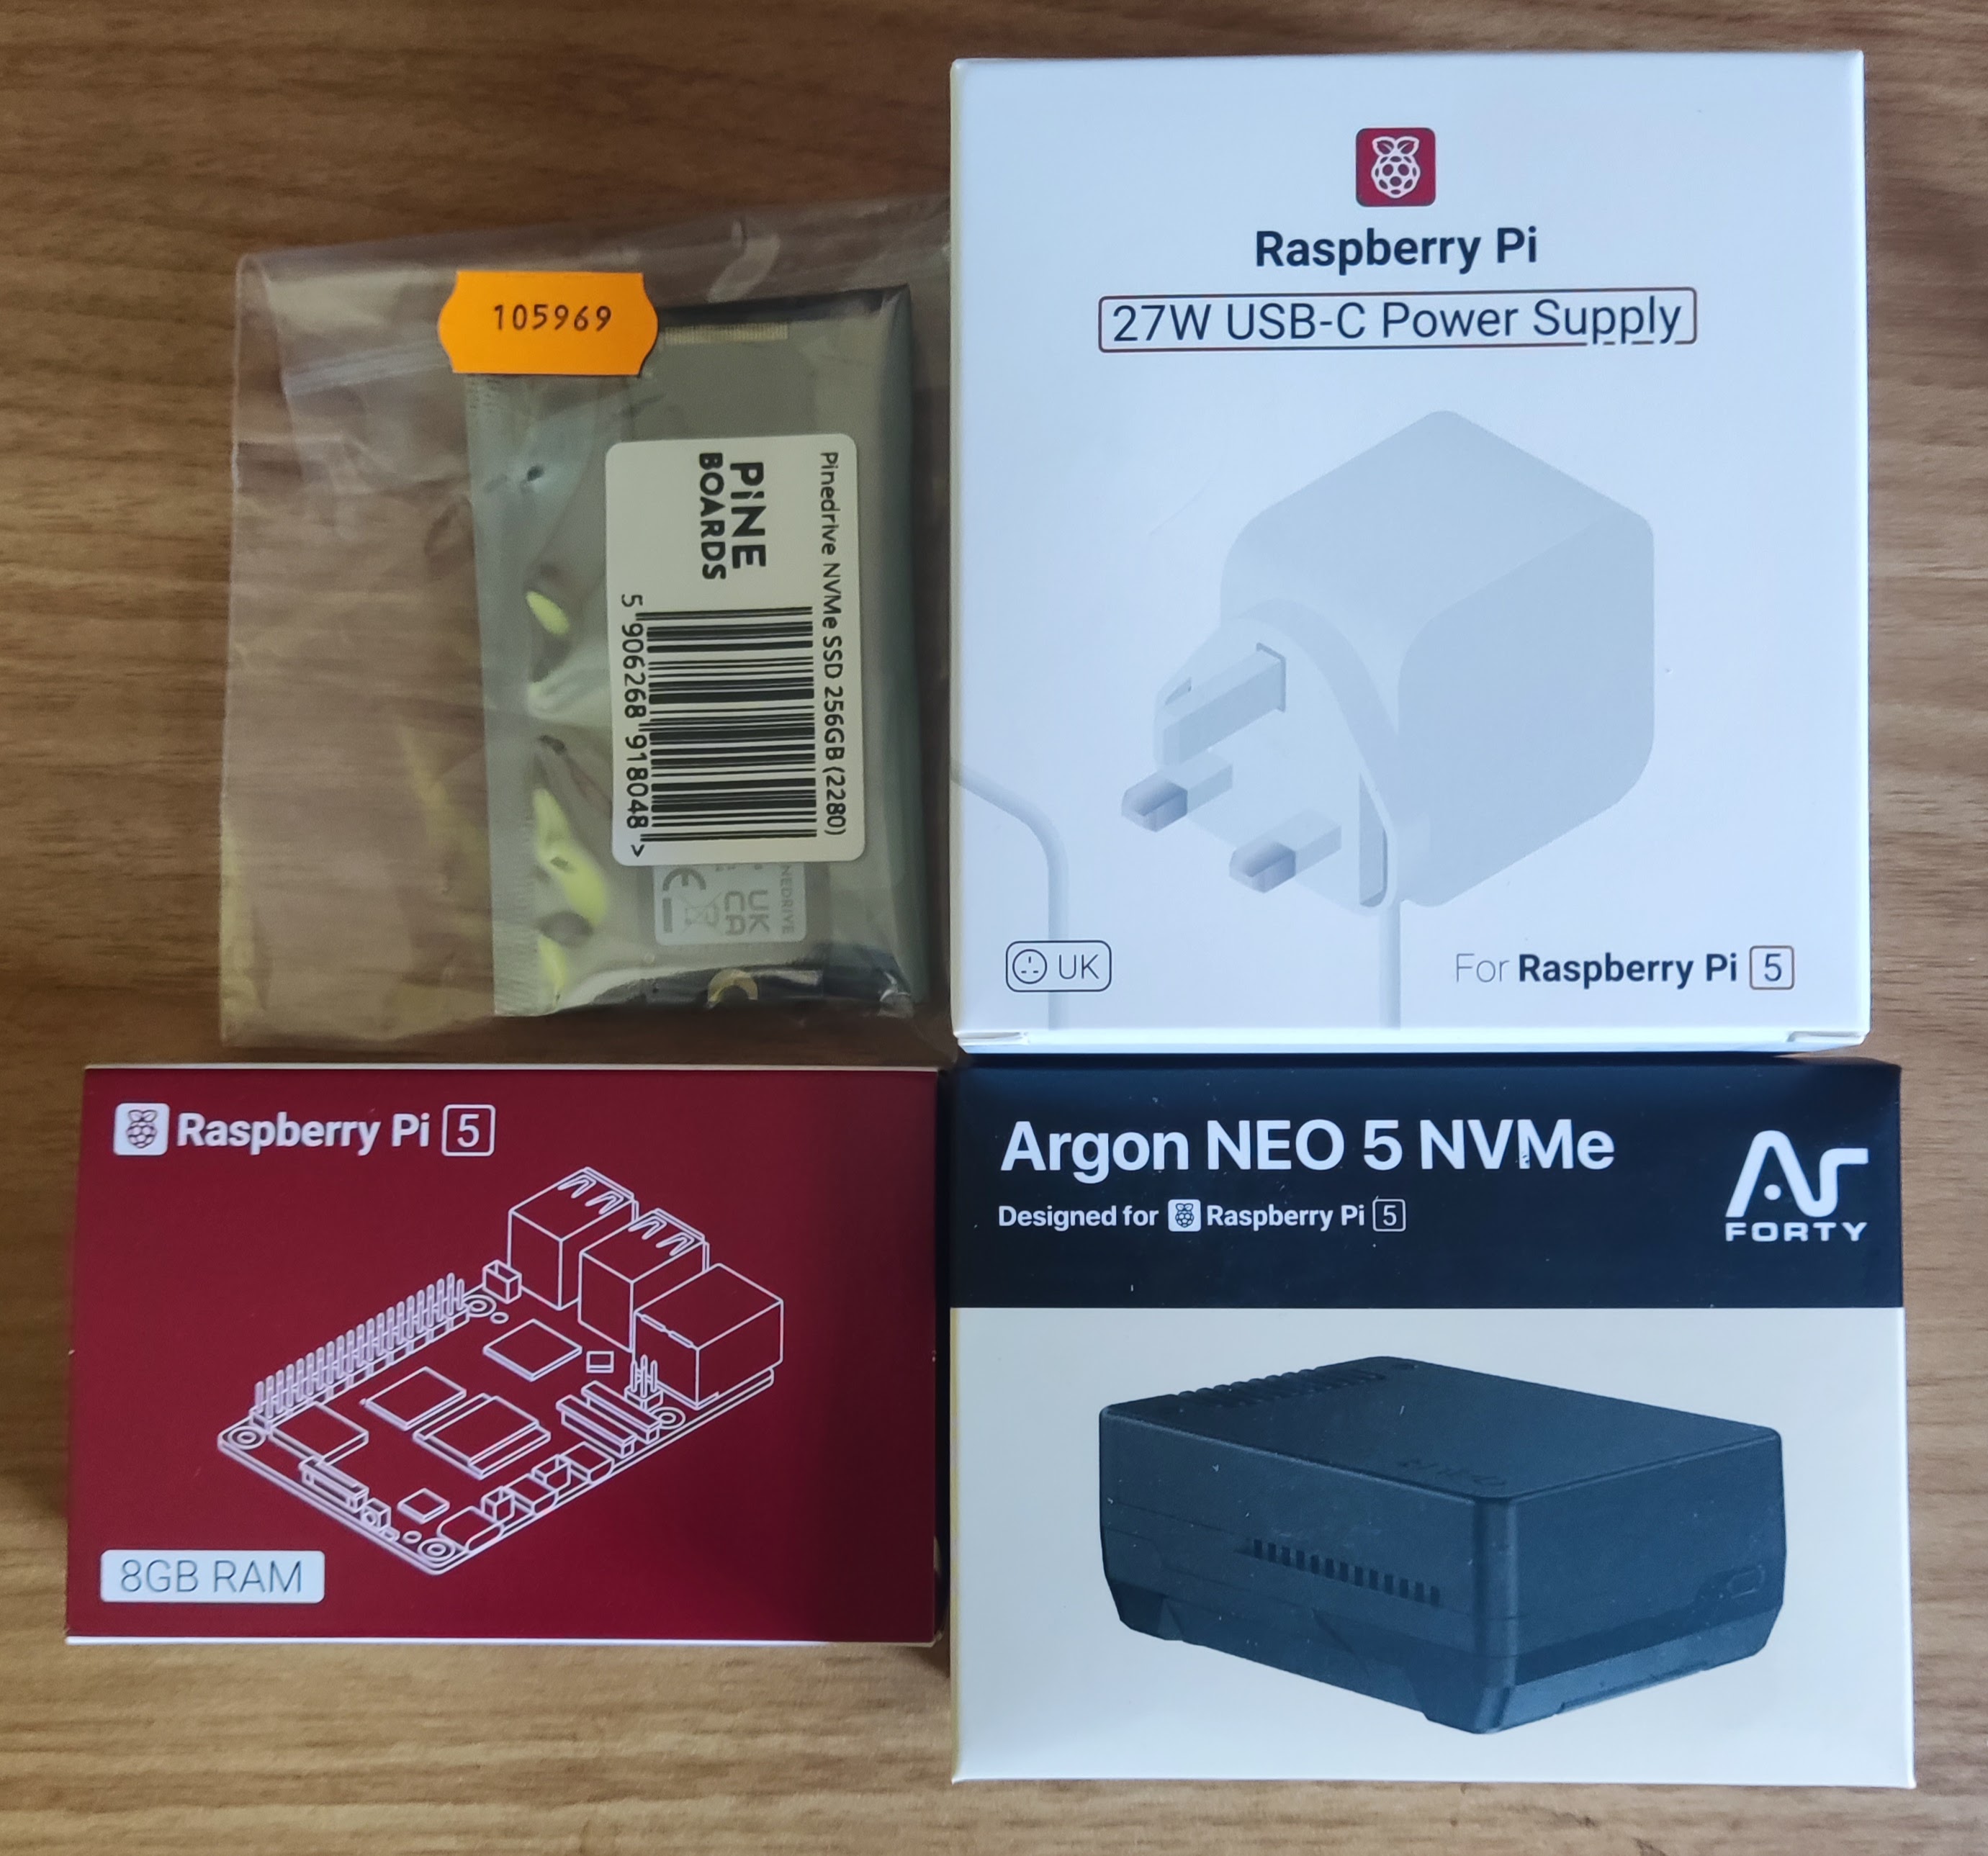
I purchased the parts from The Pi Hut, my go-to store for Pi components.
| Raspberry Pi 5 × 1 8GB | £76.80 |
| Pinedrive 256GB NVMe SSD (2280) × 1 | £39.90 |
| Argon NEO 5 M.2 NVME Case for Raspberry Pi 5 × 1 | £34.80 |
| Raspberry Pi 27W USB-C Power Supply × 1 | £11.60 |
| Shipping | £3.99 |
| Total | £167.09 |
I did consider buying the Argon ONE V3 M.2 NVME Raspberry Pi 5 Case, however I think all that gives extra is all the slots on one side. Cleaner for a desktop box, but at £46, not worth the extra money for what I wanted.
This is what arrived in the post a couple of days later.
Unboxing
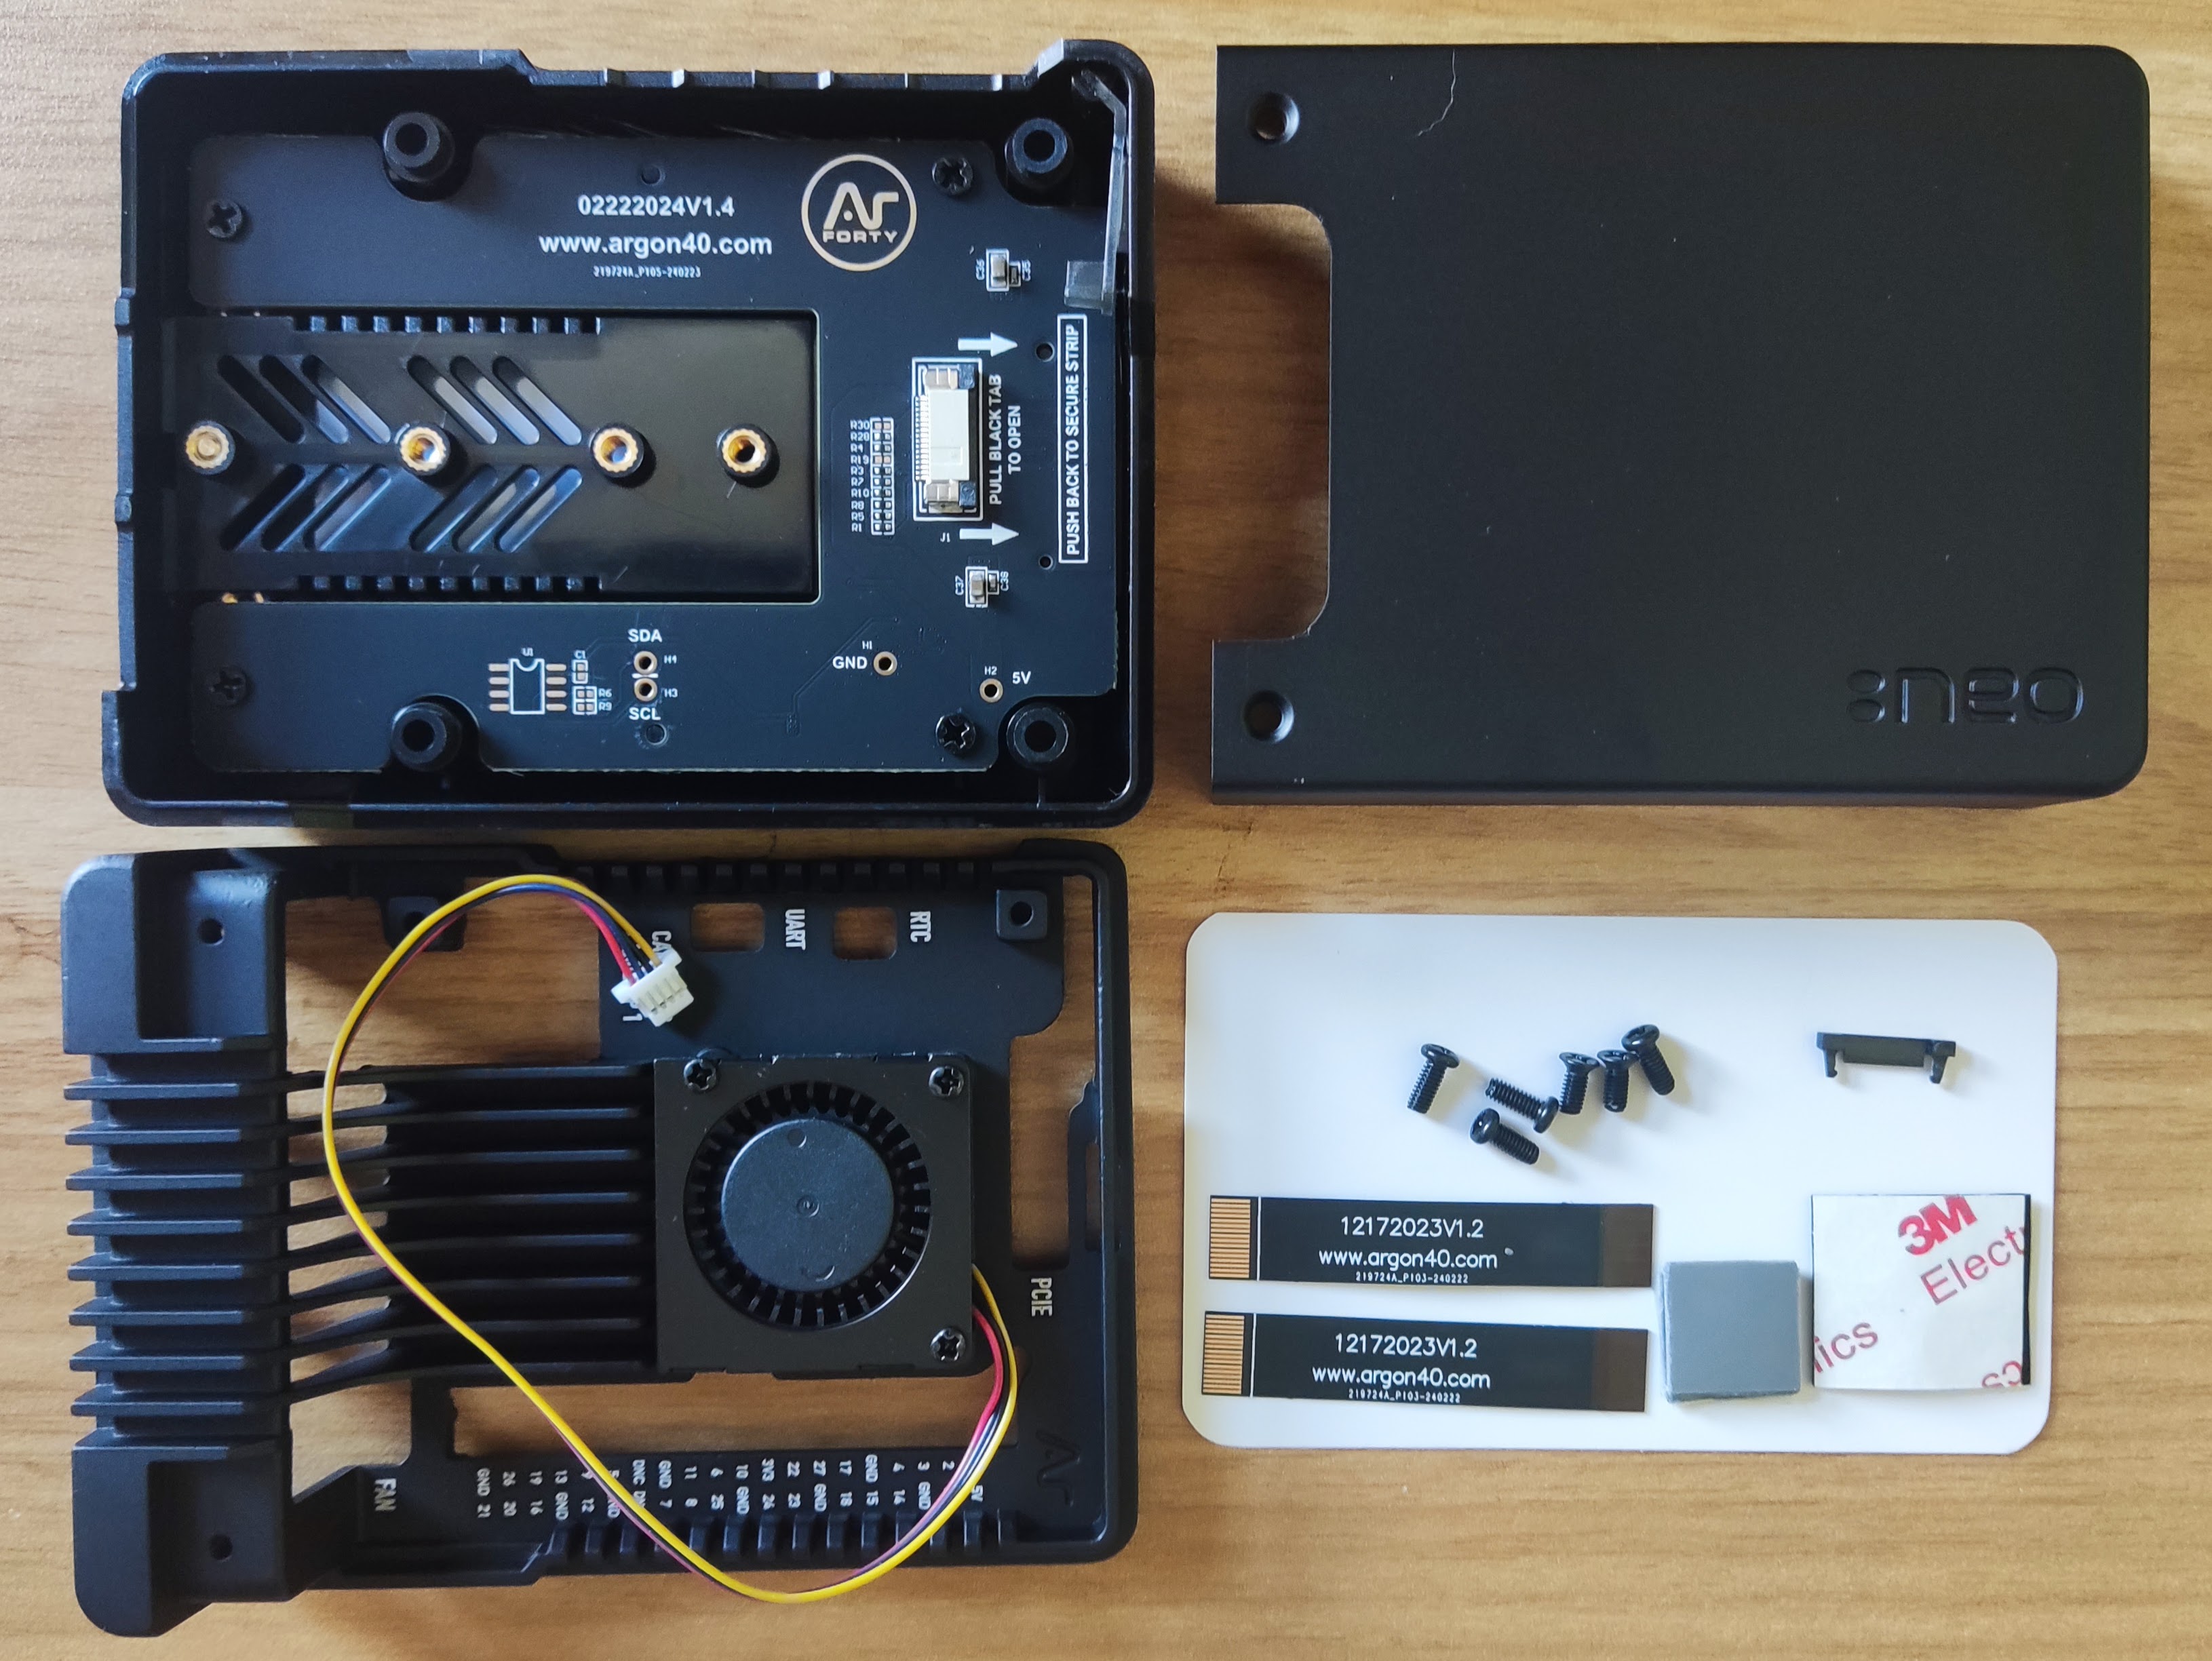
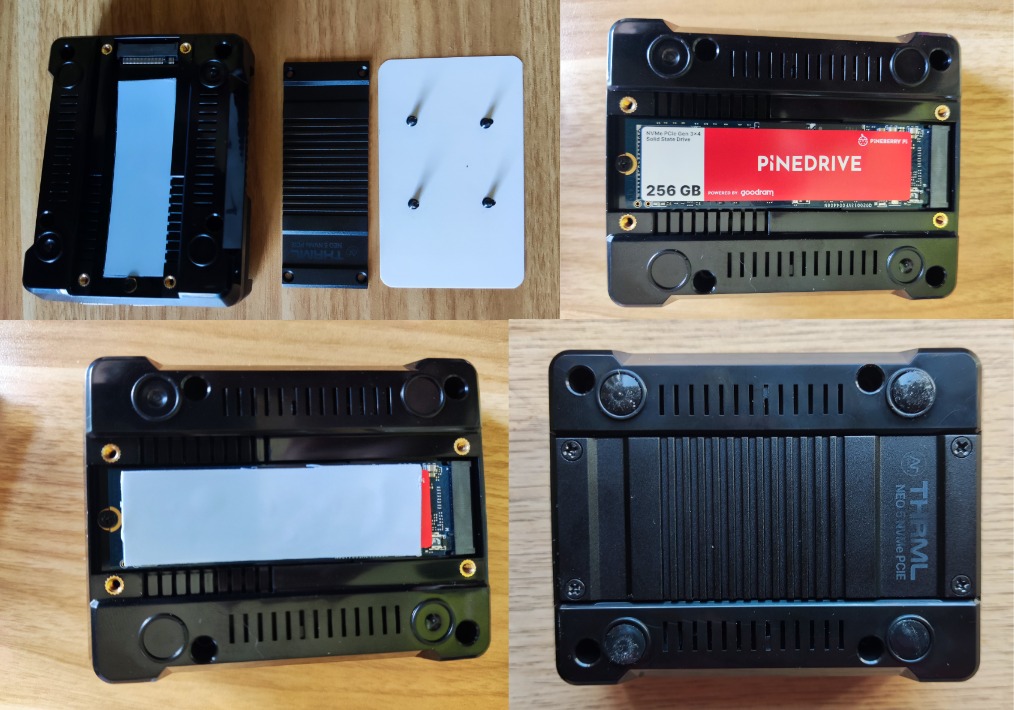
Unboxing the case we see the base (where the SSD card will sit beneath), the top of the case (which gets screwed on at the end) and the inner casement with fan. We also get an appropriate collection of screws, thermal pads, plastic foot pads and 2 PCIe connection strips. We only need one of those strips, but it is fiddly to attach and I think the spare is in case you break one.
Building
The first job is connecting the fan and the PCIe strip. Make sure you bring the fan cable through the right hole in the case as seen in the diagram below. I got it wrong first time and the wire did not flow right when I tried put the case together later on. Attaching the PCIe is very fiddly. You need to pop the clip back a millimeter or two, put the PCIe slot so it fits snuggly and then pop the clip back. None of that needs any force, be gentle. If you find you're forcing anything double check what you're doing.
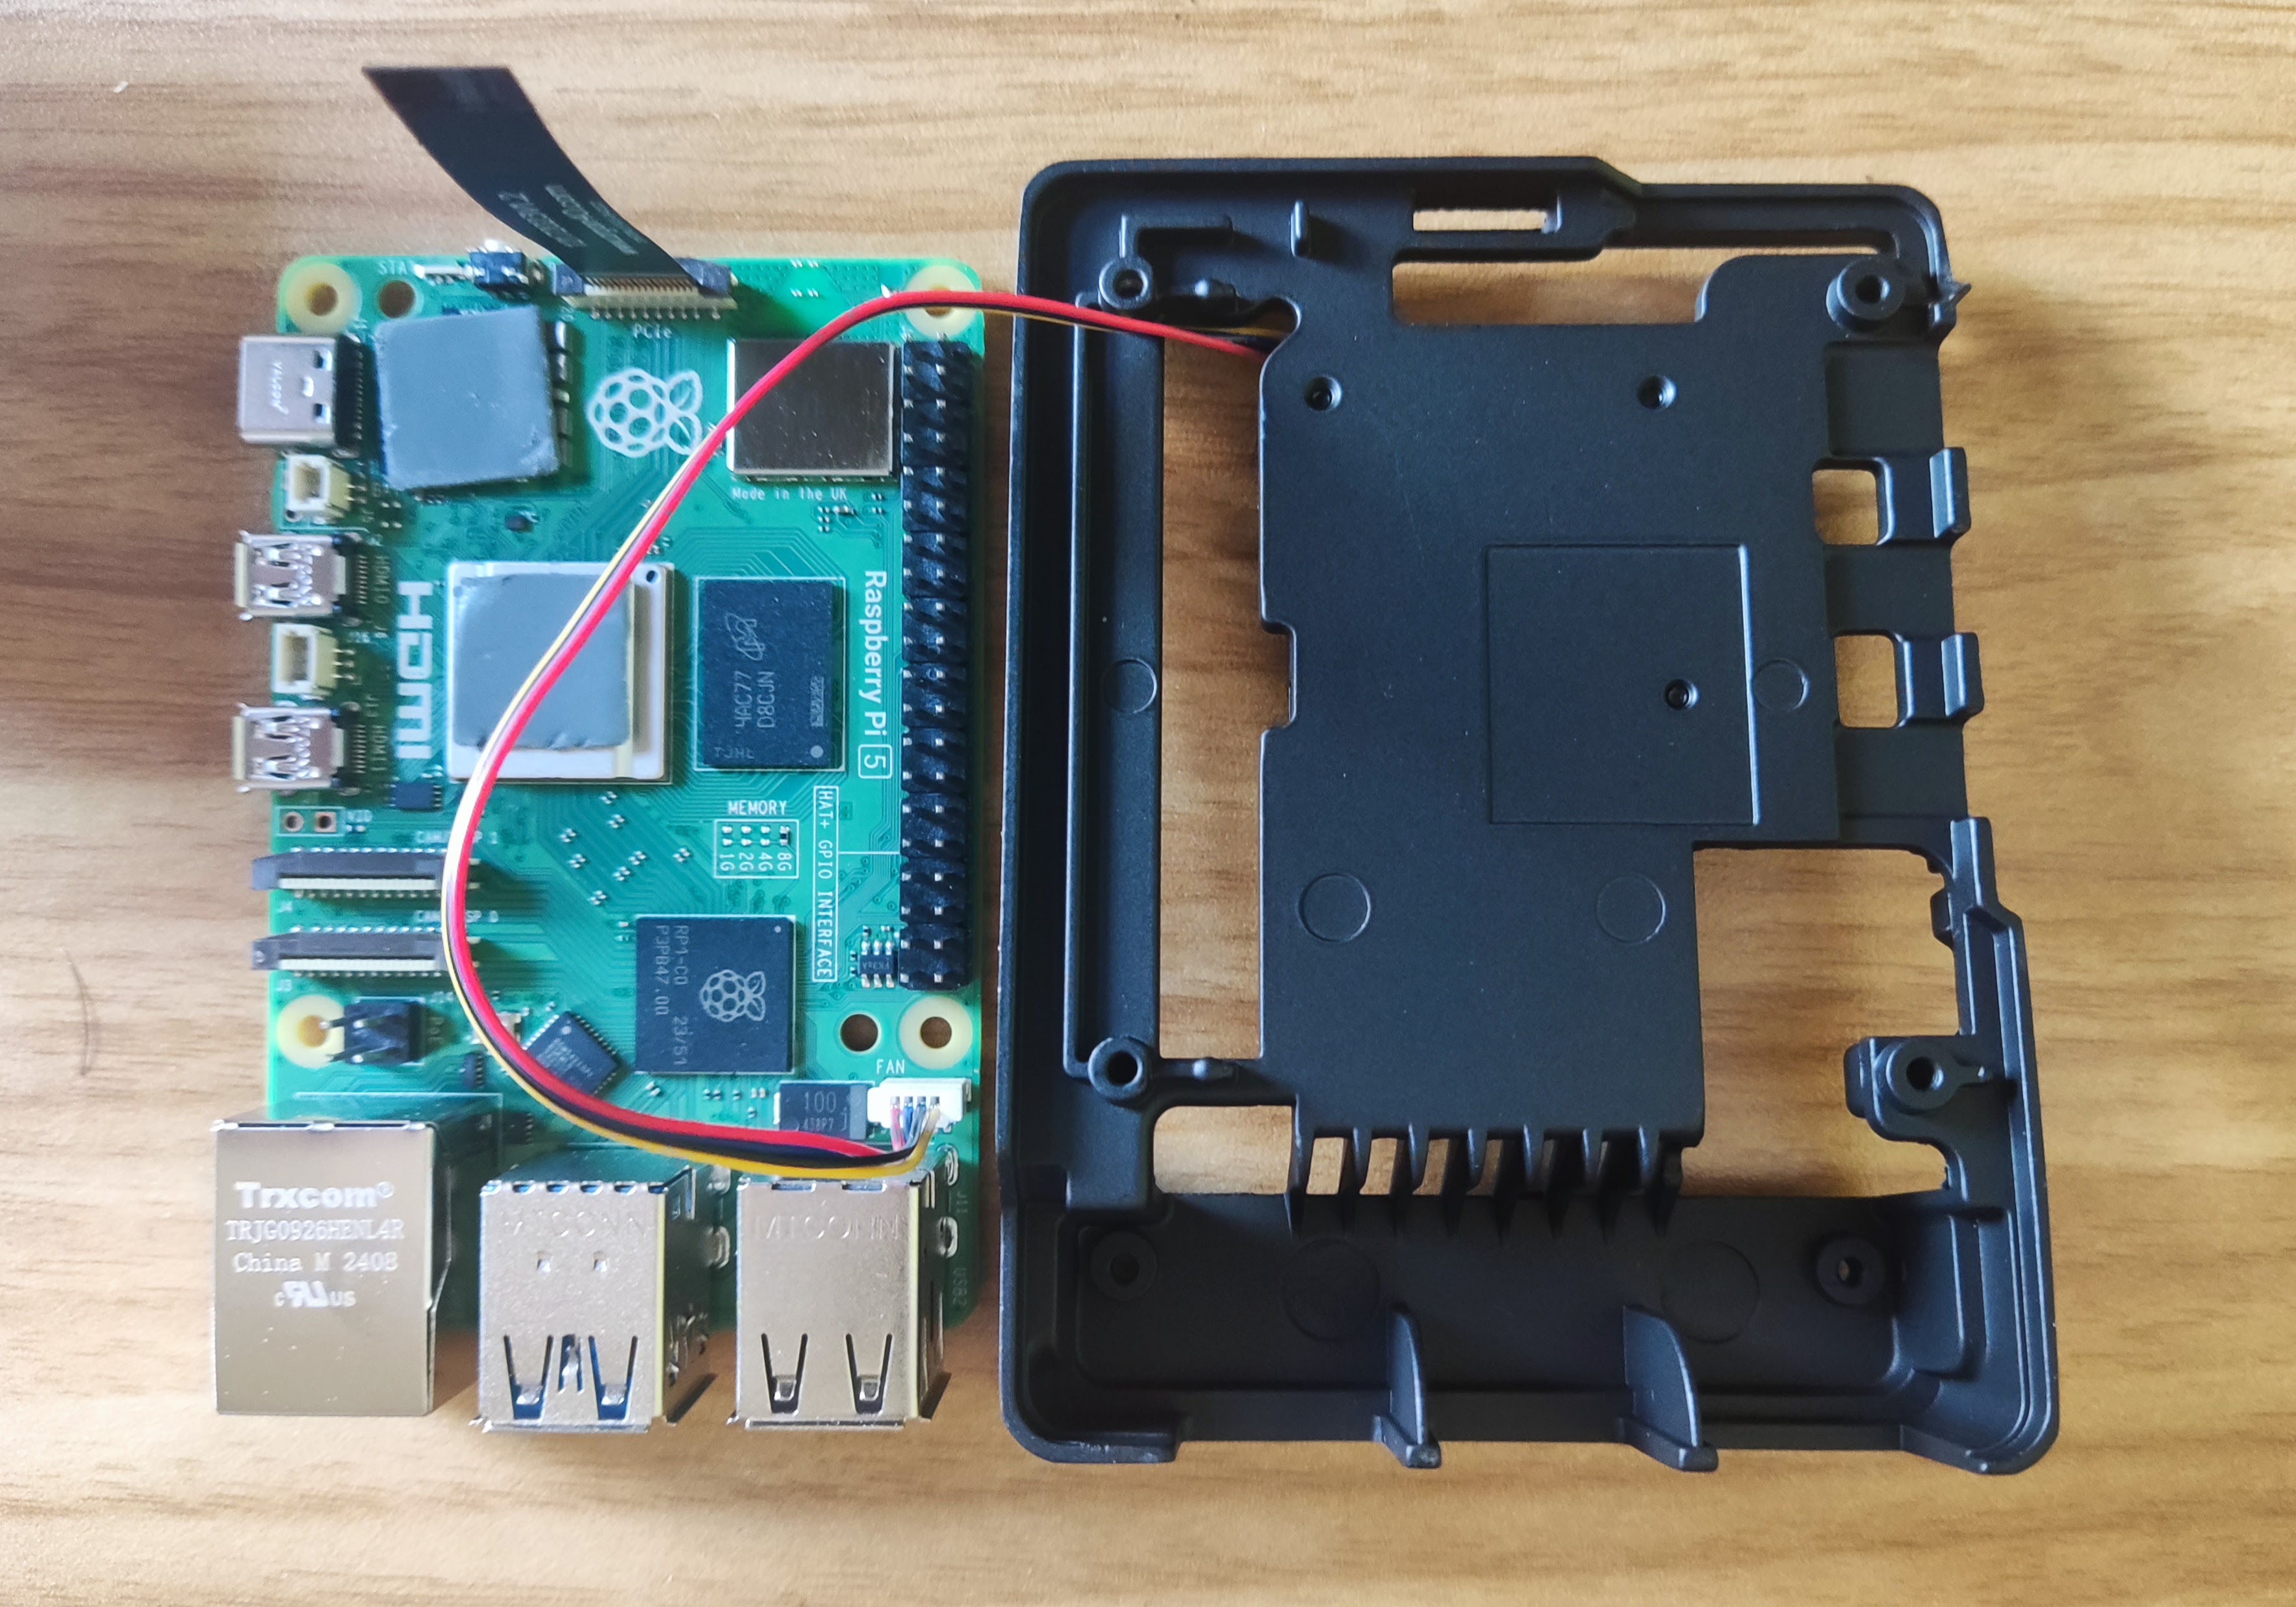
Place the Pi 5 onto the inner casement so that the fan cable follows the channel in the casement. If you don't get that right, the case won't close right. You can tidy up the fan cable as seen in photo from above. Then place the inner casement next to the base ready to connect the PCIe cable. Lift the base up slightly. I placed it on a stack of cards to get the right height. And then connect the PCIe strip to the slot in the base. As with the previous PCIe connection, slide the clip back slightly, pop the strip in and move the clip back. Be gentle, no force needed.
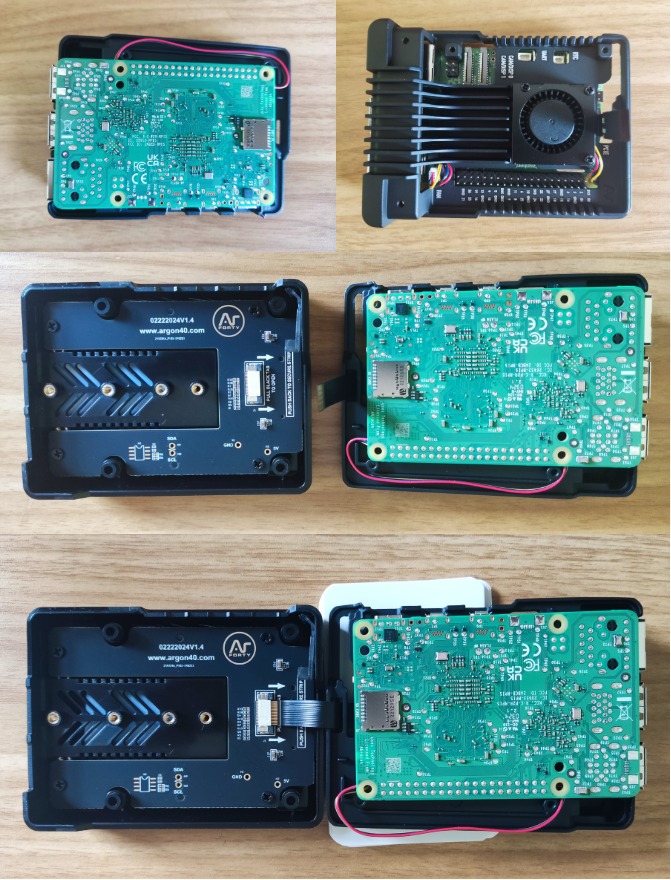
Turn the case upside down. Screw through the 4 deep holes to secure the board. Unscrew the 4 screws in the SSD back strip and lift off. Also unscrew the screw that will secure the NVMEe board in place. Clip the NVMe SSD drive in firmly and then secure the NVMe board back down with the single screw you just took out. If you want put the thermal pad on the SSD drive and then screw the back strip back in.
Now you're done. We just need to flash an image an image and start it up.
Installing Pi OS and setting up the SSD
I'll quickly run through the installation steps here. If you want more guidance on these steps do read booting a Raspberry Pi from an SSD which goes into a lot more details.
Create a Raspberry Pi image on a USB stick with Raspberry Pi Imager. The microSD slot can only be accessed in the case if you unscrew it, so an image on a USB stick is move convenient. Customise the image with the Raspberry Pi imager ready with SSH key and customised host name so you can log in direct to the Pi on boot without having to attach keyboard and screen. Then put the USB stick in the Pi and plug it in.
The Pi should have booted and initialised in a minute or so.
SSH in to your box with the host name you set in the configuration above.
ssh admin@piMake disk partitions, with 480MiB for boot partition, 20% of drive for boot and the rest reserved for future use. See partitioning SSD drive on how I choose the boundaries of these partitions.
sudo -i
parted /dev/nvme0n1 mklabel msdos
parted /dev/nvme0n1 mkpart primary fat32 2048s 983039s
parted /dev/nvme0n1 mkpart primary ext4 983040s 20%
Prepare the filesystems
mkfs -t vfat -F 32 /dev/nvme0n1p1
mkfs.ext4 /dev/nvme0n1p2
And run the magic of rpi-clone with thanks to Jeff Geerling and Bill Wilson.
curl https://raw.githubusercontent.com/geerlingguy/rpi-clone/master/install | bash
rpi-clone nvme0n1
Shutdown:
shutdown nowRemove the USB stick and restart. You should be able to log back in into a fresh Raspberry Pi running from the SSD drive with the same credentials as above.
Disk speed check
Running a disk speed check, you should be able to see some healthy IO performance.
I see a decent gain from my SATA SSD on a Pi 4.
| Type | Read | Write |
|---|---|---|
| NVME SSD Pi 5 | 452 MB/s | 398 MB/s |
| SATA SSD Pi 4 | 380 MB/s | 229 MB/s |
| USB memory stick | 36 MB/s | 26 MB/s |
Summary
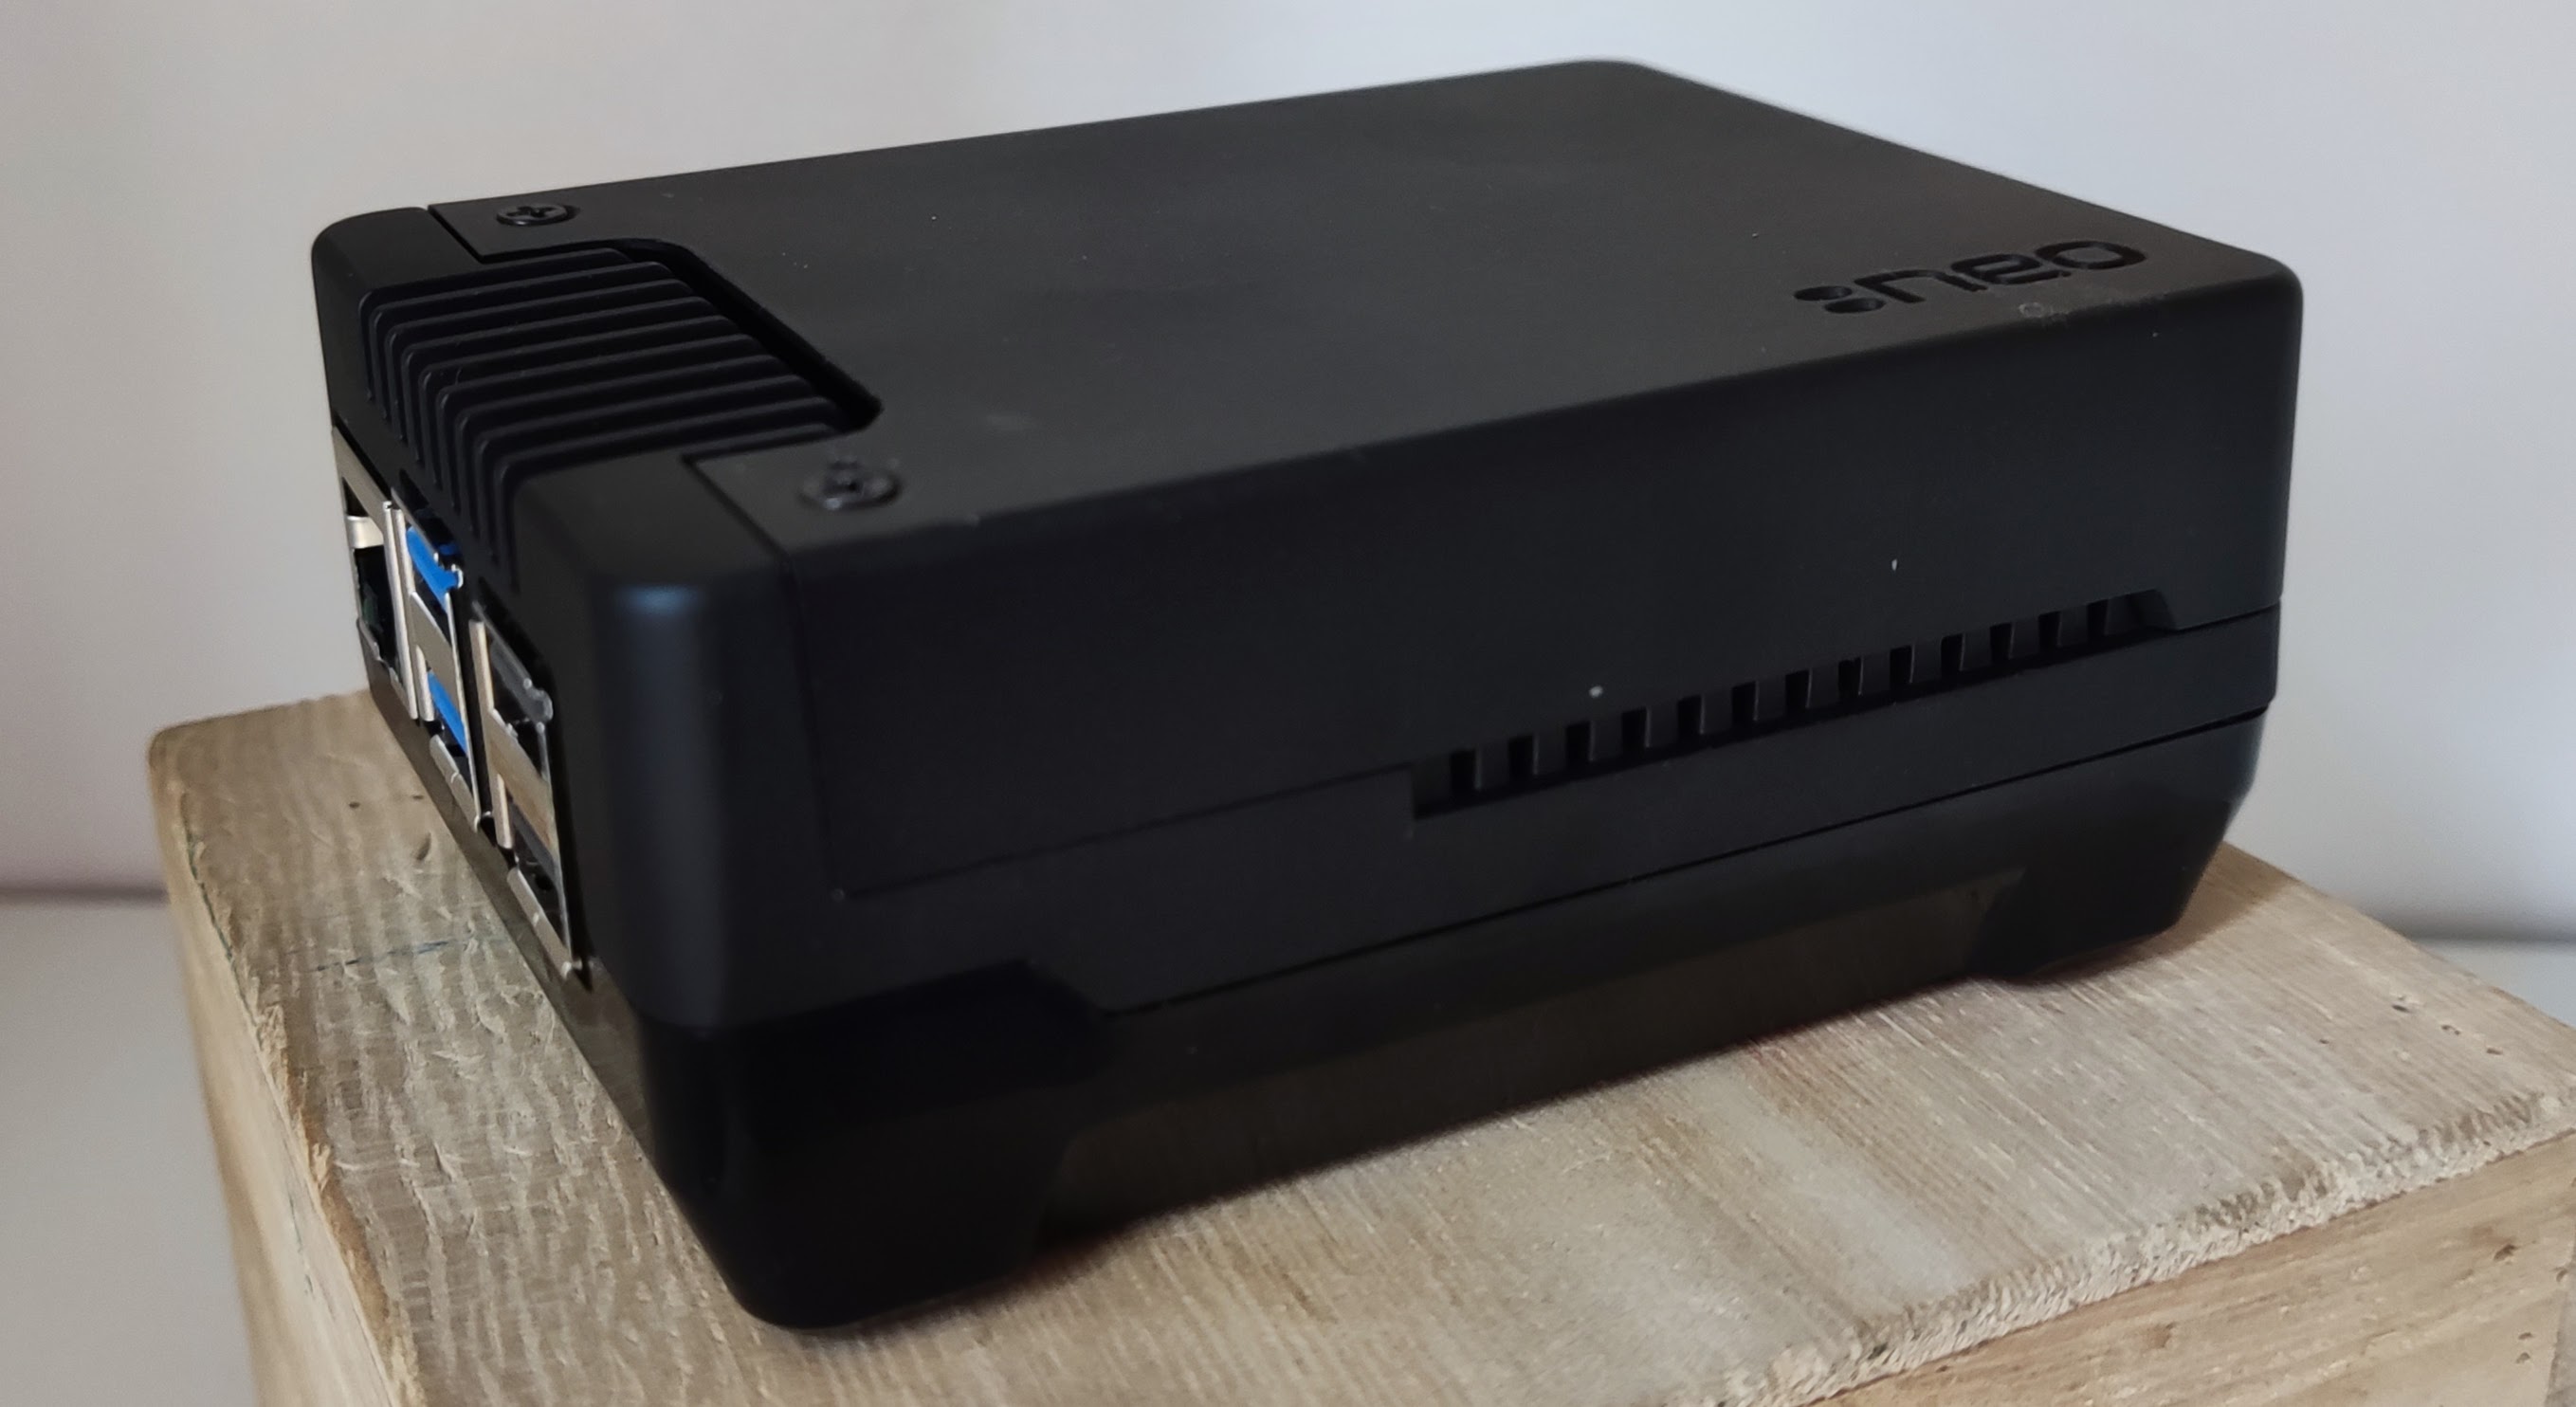
Really impressed with this NEO 5 case. Feels solid and convenient size and shape. I got this specifically for a master node in a Pi Kubernetes cluster and on initial testing of that it holds up well for that purpose. I already have an Argon ONE with SSD for a Raspberry Pi 4 and that has done well. However, I definitely prefer the size and shape of the NEO, it takes up less room and stacks better. The Argon ONE for the Pi 4 also has a USB dongle to attach the SSD drive. This always felt a little clunky to me. With the PCIe slot directly on the Pi 5 board and the Argon NEO 5 has some intelligent design choices on how to encase the SSD, connect to the board and keep it all looking tight and clean.